Welcome to Elderfield Guide
Welcome to Elderfield — Boss Fights and Elites
Uzumak, Treasure Goblin, and Dripper — where they spawn, combat patterns, and rewards.
Last updated: September 12, 2026
Quick Answer
Uzumak: heavy attacks, heal below 40% HP, save MP. Treasure Goblin: Hans Farm debris pile — loot fast. Dripper: sewers elite — flee if cursed or low on food.
Boss Fights and Elites
Three fights that punish lazy prep. Farm isn't the hard part — walking into these with stacked curses or empty MP is.
Uzumak — Laundry Room
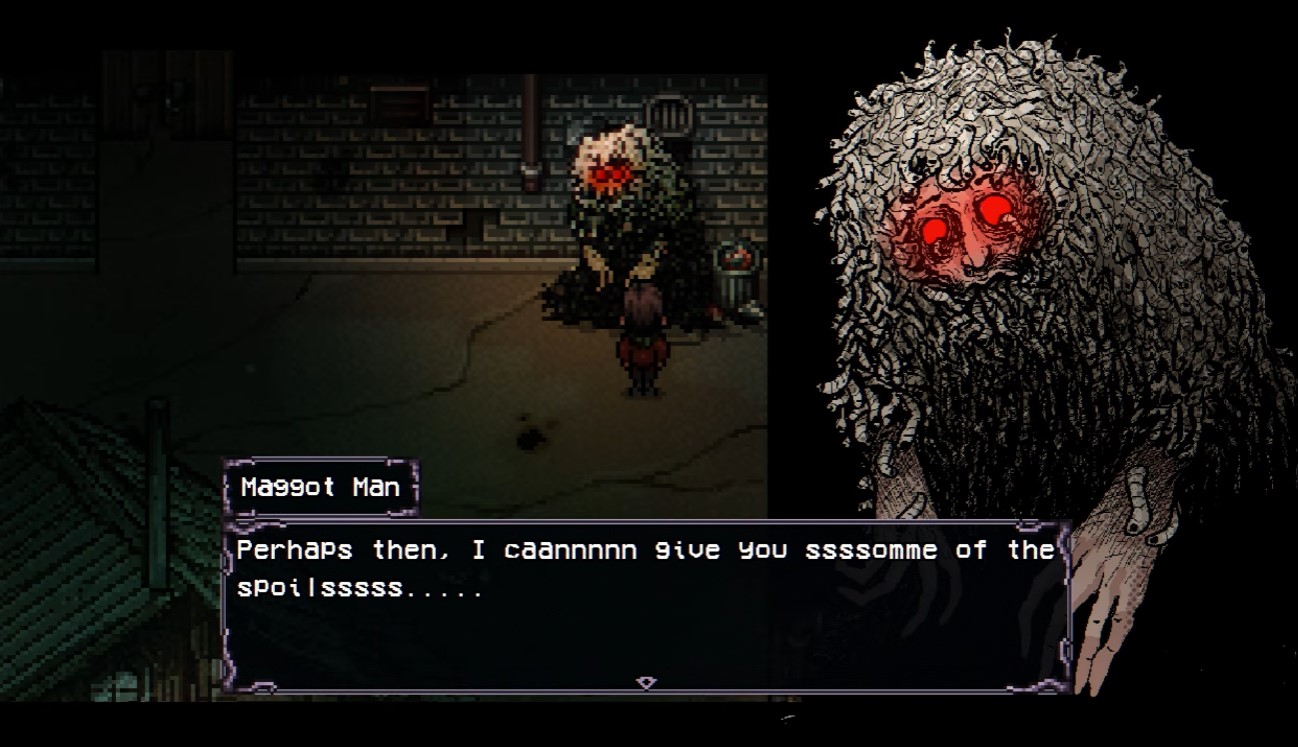
Maggot Man
Uzumak is the first boss in Welcome to Elderfield that actually punishes lazy play. It sits in the Grey Stone Residential basement laundry room, it looks like something Junji Ito sketched on a bad night, and it will absolutely drain your MP if you spam rituals like you did against trash mobs.
I tested this fight three times on the same save so I could measure MP burn per turn. The short version: heavy attacks carry the damage, rituals are support only, and healing is a reaction — not a rotation. Below is the exact sequence I use to end it in one attempt.
- Prerequisite: Accept the quest to retrieve laundry from the basement.
- Fight type: Turn-based combat.
- Winning pattern: Heavy attacks for damage, MP reserved for healing and one defensive ritual, heal the moment you drop below ~40% HP.
- Rewards: Trace's Clothes + 100 XP.
Step 1 — Get to the Basement Laundry Room
You need the laundry quest active before Uzumak is worth fighting. If you walk down without it, you're just burning resources for nothing.
- Accept the quest to retrieve laundry from the basement.
- Head into Grey Stone Residential and take the stairs down to the basement.
- Follow the corridor to the laundry room door.
Note: This is the same apartment block where you can pick up the ghost blast in welcome to elderfield ritual from Pete's laundry room. If you haven't grabbed that yet, do it before this fight — Curse damage with a Fatal bonus is a clean opener against Uzumak.
Step 2 — Read Uzumak Before You Commit
Uzumak opens aggressively. In my runs it front-loaded its heaviest hit in the first two turns, which is exactly why I don't open with a ritual.
What I track in the first round:
- My HP — if the opening hit takes me under 50%, I adjust the whole plan.
- My MP — I want at least 15 MP banked for healing and one defensive cast.
- Turn order — if Uzumak moves first, I play defensive; if I move first, I open with a heavy attack.
Tip: My personal rule is simple — never cast a damage ritual on turn one. Uzumak's opening damage is the real threat, and you want your MP intact to answer it.
Step 3 — Use Heavy Attacks as Your Main Damage
This is the core of the fight and the part most players get wrong. Heavy attacks are your damage engine here. Rituals are seasoning.
- Default action: Heavy attack, every turn, unless you're healing.
- Why: Heavy attacks don't cost MP, so your resource pool stays clean for emergencies.
- When to deviate: Only if you have a ritual that applies a status Uzumak is weak to, or a defensive buff you need to survive a big turn.
If you picked up the dark shield ritual in welcome to elderfield, this is the fight where it earns its slot. It costs 3 MP and gives +20% Defense and Magic Defense for 3 turns. I pop it on the turn I expect Uzumak's biggest hit and then go back to heavy attacks.
Step 4 — Manage MP Like It's the Last Resource on Earth
MP is the whole fight. If you run dry, you can't heal, and Uzumak will grind you down.
My MP rules for this boss:
| Situation | Action | MP Cost |
|---|---|---|
| HP above 60% | Heavy attack | 0 |
| HP 40–60% | Heavy attack, prep heal next turn | 0 |
| HP below 40% | Heal immediately | Varies |
| Big incoming turn | Dark Shield (if owned) | 3 MP |
| MP below 5 | Heavy attack only, no rituals | 0 |
Warning: Don't burn MP on low-value damage rituals. Uzumak has enough HP that a 5 MP blast won't end the fight — but that same 5 MP is a heal you'll want two turns later.
Step 5 — Heal on Thresholds, Not on Panic
Healing is where most players lose this fight. They either heal too early and waste turns, or too late and die to a follow-up.
My threshold rule:
- Above 60% HP — never heal, keep attacking.
- 40–60% HP — keep attacking, but plan the heal for next turn.
- Below 40% HP — heal now, no exceptions.
If you have early game cooking sorted, Vegetable Soup is the cleanest heal to carry into this fight. Two Bitter Herbs and two Red Mushrooms is a cheap recipe, and it keeps your MP free for rituals instead of healing casts.
Step 6 — Finish Uzumak and Claim the Rewards
Once Uzumak's HP is low, don't get cute. Keep heavy attacking. The last 20% is where players overthink and start casting rituals that cost more than they return.
When it drops:
- Trace's Clothes — the quest item you came for.
- 100 XP — a clean chunk of early progression.
Tip: If you're stacking buffs before this fight, check your welcome to elderfield blessings and curses tracker first. A single -10% Defense curse turns Uzumak's opener into a two-turn kill on you.
- Opening with a ritual. Wastes MP you need for healing.
- Healing at 70% HP. Burns a turn you could have spent attacking.
- Ignoring Dark Shield. 3 MP for three turns of +20% defense is the best trade in the fight.
- Fighting without the quest. You get nothing but a corpse run.
If I replayed this fight from scratch, I'd do two things: grab ghost blast in welcome to elderfield first for the Curse damage opener, and carry Vegetable Soup instead of relying on healing rituals. That combo let me finish Uzumak with roughly 8 MP left over — enough to walk out of the basement without a rest.
Uzumak isn't a hard boss once you stop treating it like a damage race. It's a resource check. Heavy attacks do the work, MP stays in the bank, and healing happens on thresholds. Do that and the laundry room stops being a horror scene and starts being a 100 XP payout.
Treasure Goblin — Hans Farm
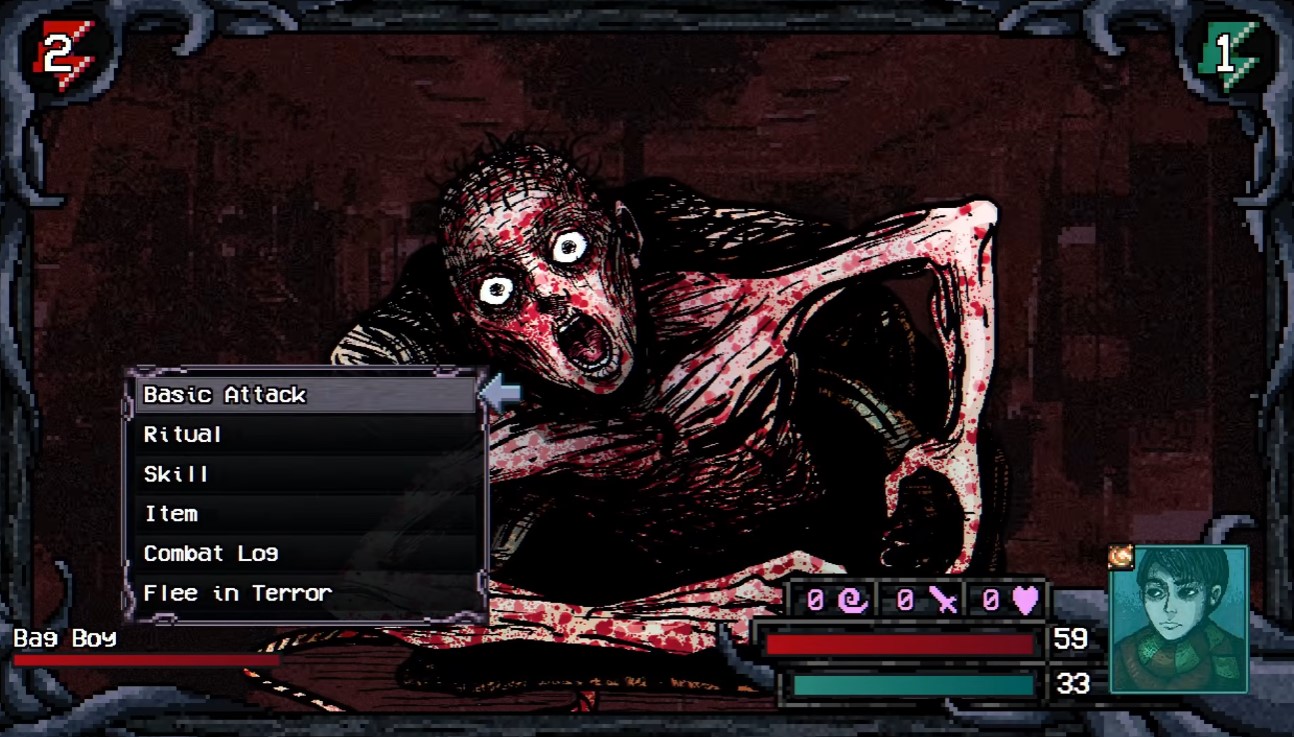
Enemy Bag Boy
Most players treat the Hans Farm debris pile as scenery and walk right past it. That's a mistake, because searching it triggers a treasure goblin ambush that hands out one of the densest early loot packages in Welcome to Elderfield.
I've run this encounter on multiple saves, and the fight itself is simple — the real value is knowing exactly what drops and why the Level 2 bump matters for everything you do afterward. Below is the rigid sequence, the loot table, and the one mistake that gets people killed here.
- Enemy: A treasure goblin appears and immediately attacks.
- Method: Basic attacks plus skills until it dies; eat food to restore HP when needed.
- Reward: Greater Potion of Greed, 3x Light Salad, Greater Potion of Brutalism, Greater Potion of Zealotry, Gym Bag, Combat Offering, Rain Gem, 100 Gold, and a Level 2 level-up.
What Triggers the Treasure Goblin
The encounter is gated behind one interaction, not a story beat. You need to have already met Farmer Hans and started working the farm — if you haven't done that yet, sort out meeting Farmer Hans at the starting farm first, because the debris pile only becomes searchable in that context.
Once you're on the farm, listen for the audio cue. A horrible sound plays, and that's your signal to search the pile of debris. Do not ignore it and wander off — the goblin spawns from that pile and the loot is tied to the kill.
Step-by-Step: How I Beat the Goblin
- Search the pile of debris the moment you hear the horrible sound. This is the only trigger.
- Expect the ambush. The treasure goblin appears out of the debris and attacks immediately — there is no dialogue window or free hit.
- Open with basic attacks and skills. Chip it down with your normal rotation; you don't need a special setup for this fight.
- Eat food to restore HP when needed. Keep Light Salad or whatever healing you're carrying on hand and use it the moment your bar dips, not after.
- Finish the goblin to receive the loot drop and the Level 2 level-up.
That's the whole fight. There's no phase change, no adds, and no elemental gimmick. The difficulty is purely about not getting caught at low HP when the goblin opens.
Tip: If you're coming straight from the shrine, pray at the small god shrine prayer first. A random blessing costs you nothing and can smooth out the opening damage if you roll something defensive.
The One Mistake That Kills People Here
Players die on this fight for a single reason: they trigger the debris pile at low HP after a long farming session and then panic-eat mid-swing.
My rule is simple — top off before you search the pile, not during the fight. The goblin's opening attack lands fast, and if you're already at 40% HP you're spending the first three seconds of the fight healing instead of dealing damage. That's how a trivial encounter turns into a corpse run.
Warning: Don't walk away from the debris pile after triggering it. The goblin is tied to that spawn point, and if you leave mid-fight you're just delaying the same problem with less HP.
Full Loot Table and Why It Matters
Here's everything the treasure goblin drops, and how I actually use each item in the early game.
| Reward | Type | Why I Care |
|---|---|---|
| Greater Potion of Greed | Consumable | Economy boost — hold it for a big purchase window |
| 3x Light Salad | Food | Your in-fight healing; also useful for the next few encounters |
| Greater Potion of Brutalism | Consumable | Offensive buff for a tougher fight later |
| Greater Potion of Zealotry | Consumable | Second offensive buff — stack these before a boss |
| Gym Bag | Item | Early inventory/utility pickup from the farm chain |
| Combat Offering | Item | Offering material, don't vendor it |
| Rain Gem | Item | Gem drop, worth keeping for later crafting or trade |
| 100 Gold | Currency | Straight early-game cash injection |
| Level 2 | Progression | The real prize — see below |
Why the Level 2 Matters More Than the Loot
I'd argue the level-up is the actual reward here, and the potions are the bonus.
Hitting Level 2 this early changes your options across the whole opening area. You get a stat bump, access to better skill usage, and you stop being one bad pull away from death in every subsequent fight. The 100 Gold and the consumables are nice, but the level is what unlocks the rest of your route.
Note: The Greater Potion of Greed and the two combat potions (Brutalism, Zealotry) are worth saving rather than chugging immediately. The goblin fight doesn't need them — a later boss will.
Where This Fits in My Early Route
I treat the treasure goblin as a mandatory stop, not optional content. It's a two-minute fight that pays out a level, gold, and a stack of consumables you'd otherwise have to grind for.
The order I run it in:
- Meet Farmer Hans and start the farm.
- Handle the debris pile and kill the goblin for the Level 2 spike.
- Use the new level to comfortably clear the next area instead of scraping through it.
If you're also collecting early materials, the welcome to Elderfield foraging and resource collection route pairs well with this stop since you're already in the farm and wilderness zone. And once you've got the Light Salads from this drop, the welcome to Elderfield cooking and recipes system becomes a lot more useful for sustaining longer runs.
Final Thoughts
The treasure goblin fight is one of those encounters that looks like a random ambush and is actually a free progression checkpoint. Trigger the debris pile at full HP, trade basic attacks and skills, eat when your bar drops, and collect a level plus a full loot bag for your trouble.
Don't overthink it — just don't start it at half health. Do that, and this is one of the cleanest early wins in the game.
Dripper — Sewers
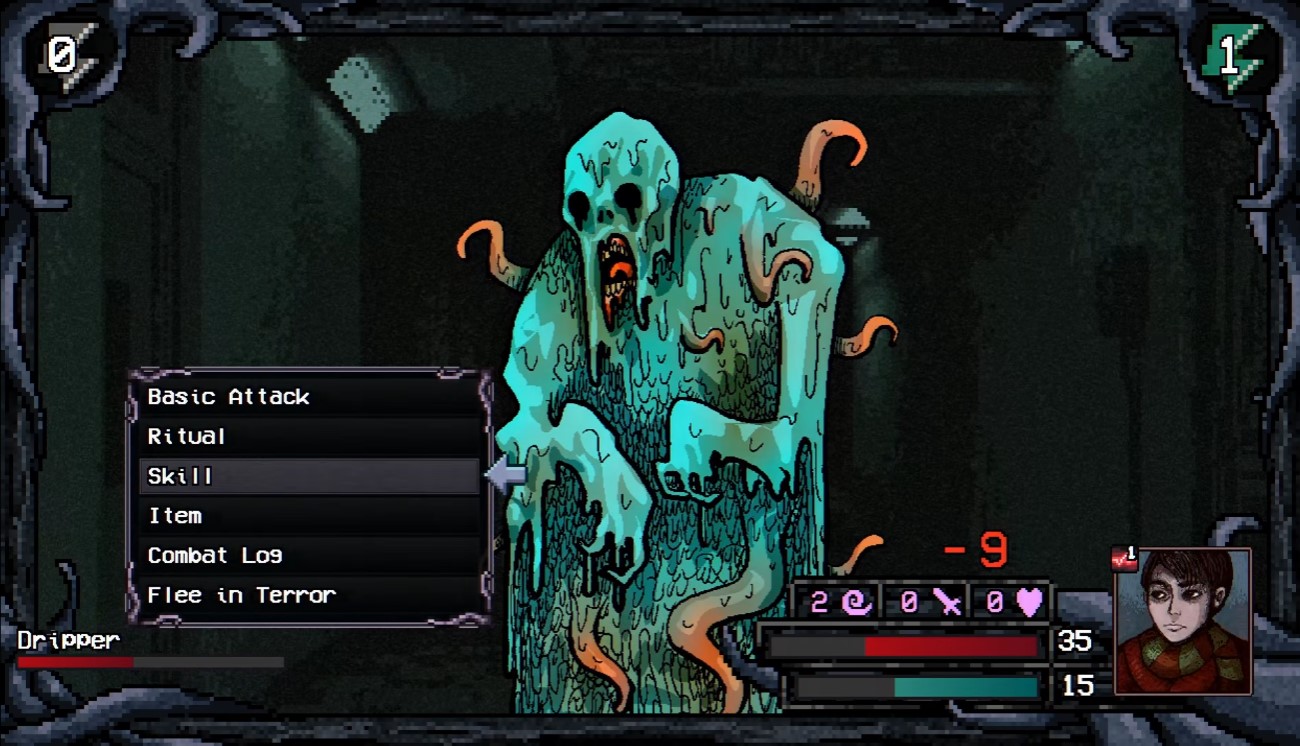
Enemy Dripper
The Dripper is the first real gut-check in the Welcome to Elderfield sewers.
It shows up while you're still mapping the tunnels, and if your gear isn't there yet, the fight punishes you for guessing. I've watched too many runs die here because players treat every encounter as a mandatory kill.
This guide is the isolated problem only: how the Dripper encounter triggers, when to fight, when to run, and what Flee actually costs you. If you're still routing the sewers for collectibles like chaos thorns, read this first so you don't lose the run on the way in.
- Encounter the Dripper in the sewers.
- If you're under-equipped, select
Fleewhile the enemy is still neutral. - Fleeing takes you all the way back home.
- Monsters regenerate after fleeing.
| Choice | What Happens | When I Use It |
|---|---|---|
| Fight | Engage the Dripper in battle — risky if under-equipped | Only with real gear and healing |
| Flee | Return home safely, monsters regenerate | Default when under-equipped |
Warning: Flee only works while the Dripper is neutral. Once the fight starts, that option is gone.
Why the Dripper Is a Trap for Early Sewer Runs
Most players enter the sewers right after the Old Woods and assume every enemy is a level check they can brute-force.
The Dripper isn't that. It's a gear check disguised as a random encounter.
If you came in with starter gear and no healing, the math doesn't favor you. The Dripper hits hard enough that a bad turn order ends the run before you can correct. That's why the encounter gives you a neutral window — the game is telling you to read your inventory before committing.
My rule is simple: if I can't survive two full exchanges without healing, I don't fight it. I flee.
Step-by-Step: How the Encounter Plays Out
Here's the exact flow I follow every time the Dripper spawns.
- Enter the sewers and keep moving through the tunnels. The Dripper triggers as you progress — you don't need to hunt for it.
- Stop and check your loadout the moment it appears. Look at your weapon, armor, and healing items. This is the only decision window that matters.
- If you're under-equipped, select
Fleeimmediately while the enemy is neutral. Do not attack first. Do not test the waters. The neutral state is your escape hatch. - Accept the teleport home. Fleeing takes you all the way back to your house — not to the sewer entrance, not to a checkpoint. All the way home.
- Re-plan before re-entering. Because monsters regenerate after fleeing, everything you cleared in the sewers comes back. Treat the next attempt as a fresh run.
Tip: I keep one healing item reserved purely for the walk back after a flee. You never know what regenerated while you were gone.
Fight or Flee: My Actual Decision Framework
I don't wing this. I run the same three checks before every Dripper encounter.
- Weapon check: Can I kill it in a reasonable number of turns, or am I chipping?
- Armor check: Can I eat two hits without dropping below half health?
- Inventory check: Do I have at least one reliable heal?
If any of those three fails, I flee. No ego, no "maybe I'll get lucky." The flee option exists precisely for this scenario, and using it is not a loss — it's a reset with information.
If all three pass, I fight. The Dripper is beatable with proper gear, and the encounter is worth clearing once you can actually survive it.
What Fleeing Actually Costs You
This is where players get confused, so let me be blunt about the trade.
| Cost | Detail |
|---|---|
| Position | You're sent all the way back home |
| Progress | Monsters regenerate — cleared sewers reset |
| Safety | You keep your character and inventory intact |
Fleeing is not a death. You don't lose your items, your levels, or your gold. You lose time and map progress. For an under-equipped player, that's a bargain compared to a wipe.
The regeneration is the real sting. If you spent twenty minutes clearing tunnels to reach the Dripper, fleeing undoes that clearing. That's why I scout my gear before entering the sewers at all — it's cheaper to prep at home than to re-clear a regenerated dungeon.
Note: Because monsters regenerate, there's no benefit to half-clearing the sewers and fleeing repeatedly. Either commit with gear or don't enter yet.
How I Prep Before Re-Entering the Sewers
After a flee, I don't rush back in. I use the trip home as a forced prep phase.
- Upgrade or swap my weapon so the Dripper fight is shorter.
- Stock healing items — cooking recipes help here if you've unlocked them via welcome to elderfield cooking and recipes.
- Grab stat boosts — the emerald ring from smoffes is an easy +2 that shifts the math in my favor.
- Farm materials if I need crafting inputs, using the [welcome to elderfield foraging and resource collection](.
/welcome-to-elderfield-foraging-and-resource-collection-how-i.md) route.
Each of these is a small edge, but stacked together they turn the Dripper from a run-ender into a routine kill.
The same three errors show up in every thread about the Dripper.
- Attacking before checking gear. Once you swing, the neutral window closes and Flee is gone.
- Assuming Flee is a soft reset. It sends you home and regenerates monsters — it's a full reset of the area.
- Re-entering immediately after fleeing. If your gear didn't change, the outcome won't either.
Avoid those three and the Dripper stops being scary. It becomes a checkpoint that tells you whether you're ready for the sewers.
My Final Take on the Dripper
The Dripper encounter is a well-designed gate. It doesn't punish you for exploring — it punishes you for exploring unprepared. The neutral state and the Flee option are the game's way of saying "come back when you're ready," and there's no shame in taking that offer.
If you're geared, fight it and move on. If you're not, flee, go home, and fix your loadout. Either way, you keep your run alive — and that's the only thing that matters in the sewers.
More Welcome to Elderfield guides
Go back to hub for full walkthrough, or browse all games.