Welcome to Elderfield Guide
Welcome to Elderfield — Ritual Skills Reference
Every ritual — where to find Energy Blast, Pumpkin Blast, Ghost Blast, Warp, and more.
Last updated: September 12, 2026
Quick Answer
Start with Energy Blast + Guard. Priority grabs: Pumpkin Blast (Old Woods), Ghost Blast (Pete), Chaos Thorns (Sewers), Warp (Mall), Dark Shield (Mall F1).
Ritual Skills Reference
Rituals are not optional. You start weak — hunt chamber doors, braziers, and vending tomes before mid-game fights.
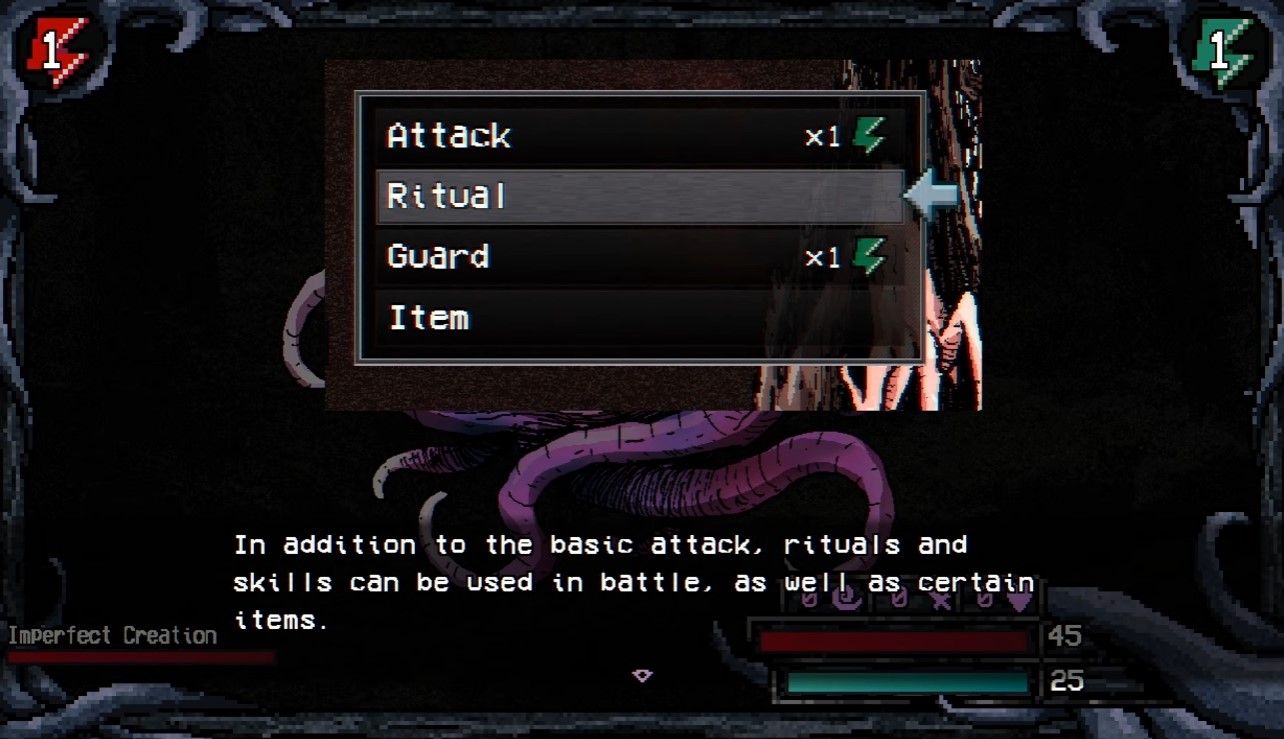
Ritual
Overview
Rituals are the backbone of your combat and utility kit in Welcome to Elderfield, and the game does not hand them to you on a silver platter. You start with exactly two — Energy Blast and Guard — and everything else has to be found, bought, or earned through exploration and progression.
I have tested every ritual I could get my hands on across multiple runs, and the difference between a player who hunts rituals and one who ignores them is night and day. This overview breaks down what rituals are, how they work, and where to prioritize your search so you are not stuck spamming a 2 MP starter spell in the late game.
- Everything else: Found in the world, purchased from vendors, or earned through events and puzzles.
- Utility rituals: Some function outside battle from the Rituals menu — these are easy to miss if you never open that menu.
- Combat rituals: Used in battle, often costing MP, and scale with your stats and blessings.
- Key sources: Old ritual braziers, chamber doors in dungeons, vending machine tomes, and specific NPC interactions.
What Are Rituals and Why They Matter
Rituals are special abilities that cover both combat and utility. In combat, they function like spells — you spend MP, you deal damage or apply effects. Outside combat, some rituals operate from the Rituals menu and handle traversal, defense, or resource management.
The trap I see new players fall into is treating rituals as optional. They are not. Your starting Energy Blast is a weak shot of energy — it works early, but it does not scale into the mid game. If you are still relying on it by the time you hit the Sewers or the Old Woods, you are making every fight harder than it needs to be.
Tip: Open your Rituals menu regularly. Some rituals are passive or utility-based and will not appear in your battle command list. I missed Warp for an embarrassingly long time because I never checked the menu outside combat.
The Two Rituals You Start With
| Ritual | MP Cost | Type | Notes |
|---|---|---|---|
| Energy Blast | 2 MP | Combat | Weak shot of energy. Reliable early, falls off fast. |
| Guard | Varies | Combat | Defensive option. Essential for surviving early ambushes. |
Energy Blast is your bread and butter for the first hour. It is cheap, it hits, and it does not require any setup. But 2 MP for a weak shot means you are trading efficiency for accessibility. The moment you find a stronger blast variant, you should be swapping it in.
Guard is the one ritual I never remove from my active set. Defense in Elderfield is not optional — the game punishes greedy play, and Guard has saved more of my runs than any offensive ritual.
How I Prioritize Ritual Hunting
When I enter a new area, rituals are one of three things I look for before anything else. Here is my priority order:
-
Chamber doors and braziers — These are the most common ritual sources. If you see an old ritual brazier, touch it. If you see a sealed chamber, open it.
-
Vending machines and vendors — Tomes and scrolls show up in shops and vending machines. Always check the Mall vending machine tomes stock.
-
Event and puzzle rewards — Some rituals are tied to specific encounters or puzzle solutions. These are easy to skip if you are rushing.
-
NPC interactions — A few rituals come from talking to the right person at the right time.
I clear the pumpkin blast chamber in the Old Woods before I do anything else in that zone because the ritual is too good to leave behind. Similarly, the chaos thorns in the Sewers is a priority grab — the Sewers are dangerous enough without skipping free power.
Combat Rituals vs Utility Rituals
Not all rituals are built for fighting. This is the distinction that trips people up.
Combat rituals are used in battle and cost MP. They deal damage, apply status effects, or provide defensive options. Energy Blast, Dark Blast, Ghost Blast, and Chaos Thorns all fall here.
Utility rituals work outside battle from the Rituals menu. Warp is the classic example — it handles traversal and would be useless in a fight. Dark Shield is another one that blurs the line, offering defense that you can pre-cast.
Note: If a ritual does not show up in your battle command list, check the Rituals menu. It is probably a utility ritual, not a bug.
Where to Find Specific Rituals
Here is what I have confirmed across my runs:
| Ritual | Source | Location |
|---|---|---|
| Energy Blast | Starting ritual | — |
| Guard | Starting ritual | — |
| Pumpkin Blast | Chamber doors | Old Woods |
| Chaos Thorns | Chamber doors | Sewers |
| Energy Shot | Old ritual brazier | Residential Area |
| Dark Blast | Find/buy/earn | Various |
| Ghost Blast | Find/buy/earn | Various |
| Energizing Blast | Find/buy/earn | Various |
| Warp | Find/buy/earn | Various |
| Dark Shield | Find/buy/earn | Various |
I touch the old ritual brazier in welcome to elderfield the moment I reach the Residential Area because Energy Shot is a direct upgrade path from your starter blast. Do not walk past it.
How Rituals Interact With Blessings and Curses
This is the part most overviews skip, and it matters. Ritual damage and effectiveness scale with your current stat modifiers, which means welcome to elderfield blessings and curses directly affect how hard your rituals hit.
If you are stacking welcome to elderfield common blessings, your blast rituals get stronger. If you are carrying curses like the Dread debuff from the strange moon event in welcome to elderfield, your Ability stat drops and your rituals underperform.
Tip: Before a boss fight, check your active blessings and curses. A single -10% Ability curse can turn a comfortable ritual kill into a resource-draining slog.
My Rule for Ritual Upgrades
I do not hoard rituals. The moment I find a stronger blast variant, I swap it in and test it against the content I am currently clearing. If it kills faster for the same or less MP, it stays. If it does not, I keep the old one and move on.
The exception is utility rituals. Warp and Dark Shield stay in my kit permanently because their value is not measured in damage per MP — it is measured in time saved and damage prevented.
If you are also working on welcome to elderfield cooking and recipes or welcome to elderfield foraging and resource collection, remember that MP management ties into your food and resource economy. Rituals are not free — every cast is MP you are not spending on something else.
- Ignoring the Rituals menu entirely. Some abilities never appear in combat and you will never know they exist.
- Sticking with Energy Blast too long. It is a starter spell. Treat it like one.
- Skipping chamber doors. If a door looks sealed, there is probably a ritual behind it.
- Not checking vendors. Tomes and scrolls rotate. If you skip the Mall, you skip upgrades.
- Forgetting that rituals scale with stats. A ritual on a cursed character is a waste of MP.
Final Thoughts
Rituals in Welcome to Elderfield are not a side system — they are your primary expression of power in combat and a significant part of your utility toolkit outside it. You start with two, and the rest of the game is about finding, buying, and earning the others.
My advice is simple: check every brazier, open every chamber, and never assume a ritual is optional. The players who clear content efficiently are the ones who treat ritual hunting as part of the main route, not a detour. If you are heading into the Old Woods or the Sewers, grab the ritual first — you will thank yourself when the boss shows up.
Old Ritual Brazier
The old ritual brazier is one of those tiny Residential Area interactions that most players walk straight past — until they realize it hands out a free ritual with zero combat attached. No boss, no puzzle box, no passcode. You just have to know where it sits and that touching it is the trigger.
I treat this as a mandatory detour on every run, because Energy Shot is a cheap ranged option that pays for itself the moment you hit the Old Woods.
Below is the exact sequence I use, plus the mistakes that make people think the brazier is broken.
- Prerequisite: Find the old ritual brazier
- Action: Interact with it to touch it
- Reward: Learn the
Energy Shotritual - Sequence: Find brazier → Interact (touch) →
Energy Shotadded to your ritual list
That's the whole loop. There is no code, no item requirement, and no choice branch — the brazier is a pure touch-to-learn trigger.
Where the Old Ritual Brazier Sits in the Residential Area
The brazier lives in the Residential Area, the same zone that holds Dave's house and its locked door. If you're already poking around the neighborhood for the welcome to elderfield passcode lock, you're standing in the right place — the brazier is a separate interactable and does not depend on that code.
What I look for:
- A stone or metal brazier structure, not a decorative prop
- An interact prompt that appears only when you're close enough
- No enemies guarding it — if something is hitting you, you're at the wrong object
If the prompt doesn't show, you're either too far out or you're looking at scenery. Walk a tight circle around the structure and let the prompt pop.
Step-by-Step: Touch the Brazier and Learn Energy Shot
- Find the old ritual brazier. Sweep the Residential Area until the interact prompt appears on the brazier structure.
- Interact with it to touch it. This is a single interaction — no hold, no minigame, no timing window.
- Learn the
Energy Shotritual. The ritual is added to your list the moment the touch resolves.
That's it. Three steps, one input, one permanent unlock.
Tip: Do this before you leave the Residential Area for the Old Woods. Energy Shot is a ranged ritual, and having it banked early means you're not backtracking through the neighborhood later just to grab a utility tool.
Why Energy Shot Is Worth the Detour
Energy Shot is a ranged ritual, which makes it a clean answer to problems that melee can't solve safely. In practice I use it for:
- Poking enemies at range before they close distance
- Handling fights where standing still is a death sentence
- Adding chip damage to boss attempts without committing to a swing
If you're building out your ritual list, this one slots in next to the other free unlocks scattered around the map. The chaos thorns pickup in the Sewers and the pumpkin blast ritual in the Old Woods both follow the same pattern: find the object, interact, walk away stronger.
Most "the brazier is bugged" reports come down to one of three things:
| Mistake | What's Actually Happening | Fix |
|---|---|---|
| Standing too far away | Interact prompt never renders | Walk directly up to the structure |
| Confusing it with scenery | No prompt on decorative props | Look for the object with a distinct interaction radius |
| Expecting a code or item | The brazier has no requirement | Just touch it — the ritual is the reward |
Note: The brazier is a touch-to-learn trigger, not a puzzle. There is no input sequence, no offering, and no failure state. If you're hunting for a hidden code, you're thinking of the welcome to elderfield passcode lock in Dave's house instead.
How This Fits Into My Residential Area Route
When I run the Residential Area, I sequence it like this:
- Clear the neighborhood and note any interactables
- Touch the old ritual brazier → bank
Energy Shot - Handle Dave's house passcode if I'm doing that side objective
- Move on to the next zone with a ranged ritual already equipped
Doing the brazier first costs seconds and removes the risk of forgetting it entirely. I've watched players finish the Residential Area, clear two more zones, then realize they never picked up Energy Shot and have to walk back.
Tip: If you're also farming blessings, the [small god shrine prayer](.
/small-god-shrine-prayer-how-i-farm-random-blessings-fast-at-hans-farm.md) at Hans Farm is a separate ritual-adjacent stop — don't mix the two up. The brazier gives a fixed ritual; the shrine gives a random blessing.
What You Get and What You Don't
To be blunt about expectations:
- You get: the
Energy Shotritual, permanently added to your list - You don't get: loot, currency, a boss fight, or a choice branch
- You don't need: any prerequisite item, code, or prior ritual
The only prerequisite is finding the brazier itself. Once you've touched it, the interaction is done and the ritual is yours.
Final Thoughts
The old ritual brazier is the cleanest kind of unlock in Welcome to Elderfield: no friction, no fail state, and a reward that stays useful for the rest of the run. If you're in the Residential Area and you haven't touched it yet, do it now — Energy Shot is one of those tools you don't notice you needed until a fight forces you to move.
Energy Blast
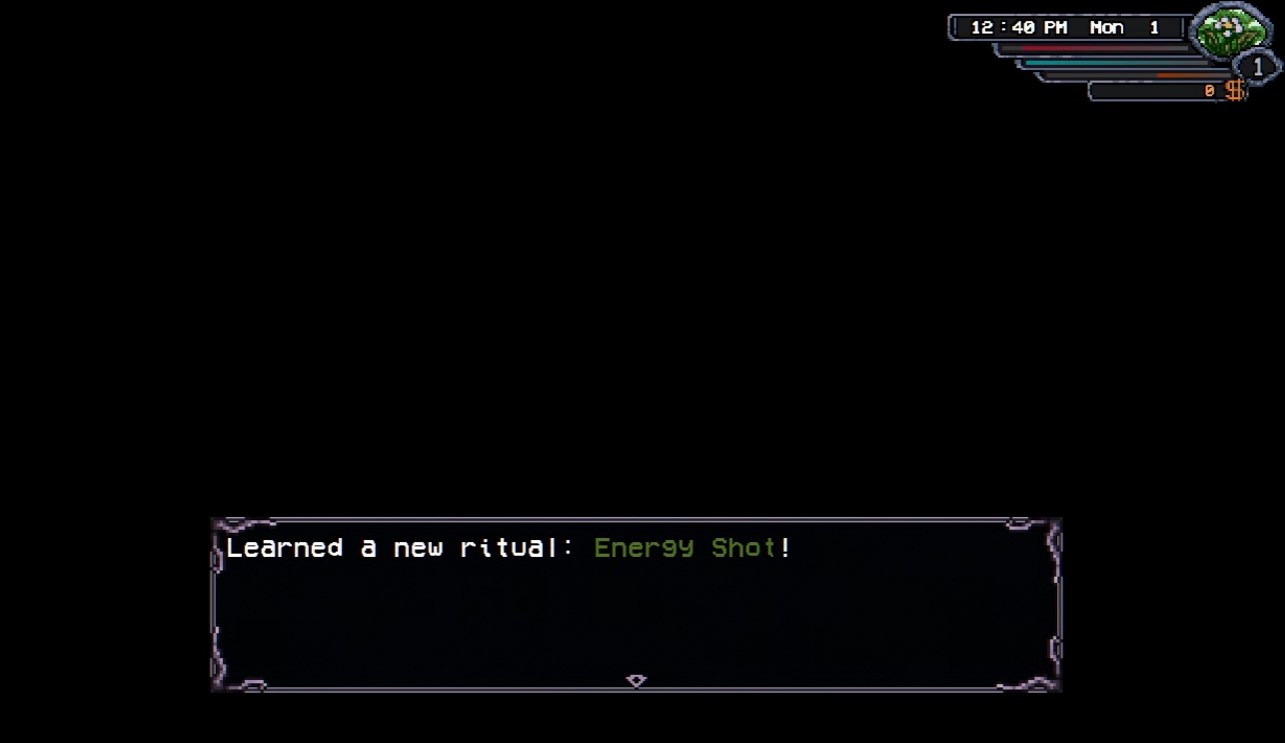
Energy Shot
Energy Blast is the first ritual most players ever fire in Welcome to Elderfield, and it is deliberately underwhelming. It is a weak shot of energy, handed to you at the start of the game before you have any real build, and its job is to teach you the ritual input loop rather than carry your damage.
I treat Energy Blast as a tutorial tool, not a weapon. This guide covers exactly what it does, how I use it in combat, and the point where I stop leaning on it and swap to a real ritual.
| Property | Value |
|---|---|
| Type | Collectible / Ritual skill |
| Chapter | Elderfield |
| Prerequisite | Given at the start of the game |
| Effect | A weak shot of energy |
| How to use | Use Energy Blast in combat |
| Reward | Energy Blast ritual |
| Related | old ritual brazier in welcome to elderfield |
Rigid steps:
- Start the game — Energy Blast is granted automatically as your starting ritual.
- Enter combat with any hostile target.
- Use Energy Blast in combat.
- Confirm the ritual is registered in your ritual list.
What Energy Blast Actually Does
Energy Blast fires a single weak projectile of energy at a target. That is the whole kit. There is no charge tier, no burn, no stagger — just a low-damage ranged poke that costs you a ritual action.
Because it is granted at the start of the game, it is the only offensive ritual you have for the opening stretch. That makes it useful for exactly one thing: letting you deal damage at range before you have anything better.
Note: Energy Blast is a starting ritual, not a reward you farm.
If you are looking for rituals you have to earn, that is a different hunt — the old ritual brazier in welcome to elderfield is where I go to learn new ones.
How I Use Energy Blast in Combat
My rule is simple: Energy Blast is a filler action, never a plan. You use it when you have nothing better to press, and you stop the moment you do.
- Opening poke: Fire it as your first action in a fight to chip a target before it closes distance.
- Safe chip damage: Use it on enemies you do not want to melee yet, especially early trash mobs.
- Ritual practice: Use it to learn the ritual input timing so your later, stronger rituals land cleanly.
- Never as a main: Do not build around it. It does not scale into the mid game.
Tip: When I tested this on the opening Elderfield enemies, Energy Blast was consistently out-damaged by basic melee once I had any weapon upgrade. I keep it slotted for range only, and I swap it out the moment a stronger ritual shows up.
When Energy Blast Stops Being Worth It
Energy Blast falls off fast. The moment you pick up a real offensive ritual, the weak energy shot becomes dead weight in your ritual slots.
Signs it is time to drop it:
- You have any ritual that hits harder than a single weak projectile.
- You are fighting anything with meaningful health, like the treasure goblin fight ambush.
- You are heading into a boss room where every action matters.
- You have unlocked a ritual that applies a status effect instead of raw chip damage.
I do not delete it from my mental list — I just stop pressing it. It costs nothing to keep as a fallback if your main ritual is on cooldown.
Energy Blast vs Other Early Rituals
Here is how I rank Energy Blast against the early ritual options you will meet in Elderfield.
| Ritual | Damage | Role | My Verdict |
|---|---|---|---|
| Energy Blast | Weak single shot | Ranged filler | Starting tool only |
| pumpkin blast | Stronger burst | Offensive ritual | Direct upgrade path |
| chaos thorns | Area pressure | Crowd control | Better for groups |
If you are still deciding what to chase next, the pumpkin blast is the natural first upgrade because it does what Energy Blast does, just harder.
Most players misuse Energy Blast in the same three ways. I made all of them on my first run.
- Treating it as a main damage source. It is not. It is a placeholder.
- Ignoring melee entirely. Early melee usually beats Energy Blast once you have any weapon.
- Forgetting it exists after upgrading. Keep it as a cooldown fallback, not a rotation staple.
Warning: Do not walk into a boss fight planning to win with Energy Blast. Against something like the Dripper encounter in the sewers, a weak energy shot will not out-pace the damage you take.
Where Energy Blast Fits in the Wider Run
Energy Blast is your first ritual, and it sits at the very start of the ritual progression curve. Everything you learn from it — input timing, range management, when to commit an action — carries into the rituals you actually build around later.
If you want the full picture of how rituals stack up, the ritual skills overview is the place to start. From there, I would chase the pumpkin blast in the Old Woods and the [chaos thorns](.
/chaos-thorns-how-i-grab-the-sewers-ritual-fast-in-welcome-to.md) in the Sewers before I ever think about optimizing a build.
For the survival side of the run, keep an eye on your stacking effects — the welcome to elderfield blessings and curses system can swing a fight far more than a weak energy shot ever will.
Energy Blast is exactly what the summary says: a weak shot of energy. It is not a trap, but it is not a build either. Use it to learn the ritual system, use it as a ranged filler while you have nothing else, and drop it the moment a real offensive ritual lands in your list.
Treat it as training wheels. Once you stop needing them, the rest of Elderfield opens up — and that is when the run actually starts.
Pumpkin Blast
Pumpkin Blast is one of those Old Woods rewards that looks optional until you realize how much it opens up your ritual loadout. The catch is that it sits behind the chamber doors, and if you wander the woods without a plan you'll burn a full loop on nothing.
This guide is deliberately narrow: it covers only the chamber-door step and the Pumpkin Blast pickup. I'm not re-treading the main Old Woods route here — that belongs in the hub walkthrough. What I will give you is the exact order I use so the ritual lands in your inventory on the first pass.
- Step 1: Open the chamber doors in the Old Woods.
- Step 2: Obtain Pumpkin Blast.
- Reward: Pumpkin Blast ritual.
- Chapter: Old Woods.
If you only remember one thing: the chamber doors are the gate, and Pumpkin Blast is the payload. Everything else in this guide is about doing those two things without wasting a trip.
Why Pumpkin Blast Is Worth the Detour
I treat Pumpkin Blast as a route-defining pickup rather than a completionist checkbox. Rituals in Welcome to Elderfield tend to reshape how you approach later encounters, and this one is no exception — it's the kind of tool that changes your answer to "do I have enough burst for this room?"
Here's the honest framing, though: this is a side objective. If you're mid-progression and the Old Woods chamber doors aren't accessible yet, don't force it. Come back when the doors are live, then run this route clean.
Note: Pumpkin Blast is listed as a ritual reward, not a consumable. Once you have it, it stays with you — so there's no pressure to use it immediately.
Step 1 — Open the Chamber Doors in the Old Woods
The chamber doors are the entire prerequisite. Until they're open, Pumpkin Blast is unreachable, full stop. I've seen players sprint past the door trigger and then spend twenty minutes wondering why the ritual never spawned.
What you need to do:
- Get into the Old Woods with the chamber doors accessible.
- Approach the doors and trigger the open.
- Confirm the doors have actually opened before you move on — don't assume.
If you're still working your way through the woods for the first time, the door step is the one thing you shouldn't rush. I always pause for a beat after the doors open to make sure the state change registered before I commit to the pickup.
Tip: My rule is simple — if the doors haven't visibly opened, the ritual isn't there yet. Re-check the door interaction before you start searching the surrounding area.
Step 2 — Obtain Pumpkin Blast
Once the chamber doors are open, Pumpkin Blast is the direct follow-up. There's no puzzle chain, no hidden second gate, no choice branch — you open the doors, then you take the ritual. That's the whole loop.
What to do:
- Move into the chamber area after the doors open.
- Locate the Pumpkin Blast pickup.
- Collect it and verify it's registered as the Pumpkin Blast ritual.
I keep this step boring on purpose. The temptation is to start exploring the chamber for extra loot, and that's exactly how people miss the ritual or lose track of whether they actually grabbed it. Grab Pumpkin Blast first, then explore if you want.
Warning: Don't leave the chamber without confirming the pickup. If you walk out unsure, you'll be making a second trip — and the Old Woods aren't short.
Pumpkin Blast at a Glance
| Item | Detail |
|---|---|
| Name | Pumpkin Blast |
| Type | Ritual |
| Chapter | Old Woods |
| Prerequisite | Chamber doors opened in the Old Woods |
| Reward | Pumpkin Blast ritual |
| Choice branch | None |
That table is the whole collectible in one screen. If you're the kind of player who just wants the checklist, you're done — open the doors, take the ritual.
My Route Judgment
Here's where I'll be opinionated, because that's the point of this format. Pumpkin Blast is a clean pickup once the doors are open, and it's a miserable one if you try to reverse-engineer it. The failure state isn't difficulty — it's sequencing.
When I tested this route, the only real time sink was confirming the door state. Everything after that is a straight line. So my advice is to treat the chamber doors as a hard checkpoint: don't move past them until they're open, and don't leave the chamber until Pumpkin Blast is in your inventory.
Tip: If you're running a broader Old Woods sweep, slot Pumpkin Blast in right after the door step rather than saving it for the end of the session. Ritual pickups are easy to forget once you're deep in a route.
- Searching before the doors are open. Pumpkin Blast won't be there. The door state is the gate.
- Assuming the pickup is automatic. You still have to collect it — it doesn't just appear in your inventory because the doors opened.
- Treating it as a main-route requirement. It's a side collectible. Don't derail your story progress for it if the doors aren't ready.
- Leaving without verifying. One extra glance saves a full return trip.
Wrapping Up
Pumpkin Blast is a two-step collectible with a single hard prerequisite, and that's genuinely all there is to it. Open the chamber doors in the Old Woods, take the ritual, and move on with your run. If you're building out your ritual toolkit, this is one of the cleaner pickups in the chapter — no branching, no RNG, no guesswork.
Ghost Blast
Ghost Blast is one of the easiest rituals to miss in Welcome to Elderfield, because it doesn't come from a tome, a vending machine, or a chamber door. It comes from a ghost doing laundry. If you walked past the apartment laundry room without talking to Pete, you left a free curse-damage ritual on the table.
I treat Ghost Blast as a mid-tier damage option rather than a core skill, but the +1 Fatal and the Fear proc give it real upside in longer fights. Below is the exact pickup, the full stat line, and when I actually slot it into my rotation.
- How: Receive Ghost Blast from Pete, the laundry ghost.
- Prerequisite: Gift from Pete (laundry ghost) in the apartment laundry room.
- Effect: Curse damage; +1 Fatal; may Fear.
- Cost: 5 MP.
- Reward: Ghost Blast ritual.
Step-by-Step: How I Get Ghost Blast
- Head to the apartment building and enter the laundry room.
- Find Pete, the laundry ghost, inside.
- Talk to him and accept the gift — this is the entire unlock. No fight, no puzzle, no purchase.
- Confirm Ghost Blast now appears in your Rituals menu before you leave.
That's it. There is no hidden trigger and no second visit required. The only way to fail this is to never walk into the laundry room in the first place.
Tip: If you're already tracking rituals broadly, cross-check your list against the ritual skills overview so you know exactly which slots are still empty.
Ghost Blast Stats at a Glance
| Property | Value |
|---|---|
| Damage type | Curse |
| Bonus | +1 Fatal |
| Status chance | May inflict Fear |
| MP cost | 5 MP |
| Source | Pete (laundry ghost) |
| Location | Apartment laundry room |
How I Actually Use Ghost Blast
Ghost Blast is not a spam button. At 5 MP a cast, it sits in the same cost bracket as the other mid-tier blasts, so I only fire it when the curse typing or the Fatal bonus matters.
- Curse damage: Use it against anything that resists physical or energy damage but folds to curse.
- +1 Fatal: This is the real reason I keep it equipped. Fatal pushes you toward crit-style spikes, so it rewards high-Fatal builds.
- Fear proc: Unreliable, but when it lands it buys you a free turn of tempo. Treat it as a bonus, never a plan.
Note: I tested Ghost Blast against the same enemy set as Dark Blast in Welcome to Elderfield, and the two are near-identical in cost and shape. Dark Blast rolls Hex instead of Fear. Pick based on which status your build can exploit, not raw damage.
Ghost Blast vs. the Other Blasts
If you're deciding what to keep in your active ritual slots, this is the comparison I run:
| Ritual | Damage | Bonus | Status | MP |
|---|---|---|---|---|
| Ghost Blast | Curse | +1 Fatal | May Fear | 5 |
| Dark Blast | Darkness | +1 Fatal | May Hex | 5 |
| Energy Blast | Energy | — | — | Low |
| Pumpkin Blast | Blast | — | — | Varies |
My rule: Energy Blast is your cheap filler, Ghost Blast and Dark Blast are your Fatal payoffs, and Pumpkin Blast is a separate pickup entirely. Don't run Ghost Blast and Dark Blast in the same loadout unless you have MP to burn — they overlap too much.
- Skipping the laundry room. Players assume the apartment is story-only and never check side rooms. That's how you lose a free ritual.
- Treating Fear as guaranteed. It isn't. If your plan depends on the Fear landing, your plan is bad.
- Ignoring the Fatal bonus. Ghost Blast's value is the +1 Fatal, not the base damage. Build around it or don't bother.
- Overpaying MP. At 5 MP a cast, spamming it in trash fights drains you fast. Save it for enemies where curse typing or Fatal actually converts.
Warning: If you're stacking curses on yourself through events like the night terrors event in Welcome to Elderfield, don't confuse your own debuffs with Ghost Blast's Fear proc. One is your problem, the other is the enemy's.
Where Ghost Blast Fits in My Progression Route
I grab Ghost Blast early, right after I've sorted my basic rituals, because it costs nothing but a conversation. From there:
- Pick up Energy Blast as your cheap filler if you haven't already.
- Grab Ghost Blast from Pete for the Fatal payoff.
- Add Dark Shield Ritual or another defensive option so you survive long enough to use it.
- Round out the list with whatever else you find — the [mall vending machine tomes](.
/mall-vending-machine-tomes-how-i-buy-every-ritual-fast-in-we.md) are a reliable source if you have currency.
If you're also chasing stat-boosting gear, the Emerald Ring from Smoffes pairs well with a Fatal-focused build, and the small god shrine prayer can hand you a random blessing that occasionally lines up with it.
FAQ
Is Ghost Blast missable? Not permanently, but you have to actually enter the apartment laundry room and talk to Pete. If you never go, you never get it.
Does Ghost Blast cost anything to learn? No. It's a gift. The only cost is the 5 MP per cast in combat.
Is Ghost Blast better than Dark Blast? They're the same cost and shape. Ghost Blast rolls Fear, Dark Blast rolls Hex. Choose based on your build, not the numbers.
Should I use Ghost Blast on every enemy? No. Use it where curse damage or the +1 Fatal actually converts. Otherwise you're just burning MP.
Final Thoughts
Ghost Blast is a low-effort, decent-payoff ritual. The pickup takes under a minute, and the +1 Fatal gives it a clear role in any crit-leaning build. I don't consider it mandatory, but I also don't skip it — free rituals are free, and the laundry room is one conversation away from a permanent addition to your kit.
If you're methodically filling out your ritual list, treat Ghost Blast as a checkbox you clear early and then forget about until a fight actually calls for curse damage. That's exactly how I use it.
Dark Blast
Dark Blast is one of the first rituals in Welcome to Elderfield that actually punishes enemies instead of just poking them. It deals Darkness damage, adds +1 Fatal, and can land a Hex on top — all for 5 MP.
The catch is that you don't buy it and you don't find it in a chest. You have to finish Build-A-Wife first, then go back and talk to Old Man Jackson. This guide covers the exact order, what the ritual does in combat, and why I slot it into my early rotation every run.
| Property | Value |
|---|---|
| Type | Ritual (collectible skill) |
| Location | Old Man Jackson's |
| Prerequisite | Complete Build-A-Wife |
| Unlock step | Talk to Old Man Jackson |
| Cost | 5 MP |
| Effect | Darkness damage; +1 Fatal; may Hex |
| Reward | Dark Blast ritual |
Rigid steps:
- Complete Build-A-Wife.
- Talk to Old Man Jackson.
- Dark Blast is added to your Rituals menu.
What Dark Blast Actually Does
Dark Blast is a Darkness-element attack, which matters more than it sounds. A lot of early Elderfield enemies don't resist Darkness, so the damage lands clean while you're still stuck with weak starter options.
The two riders on top of the hit are what sell it for me:
- +1 Fatal — pushes your crit pressure up on the same cast.
- May Hex — a chance-based debuff that stacks onto the target's misery.
At 5 MP it's not free, but it's cheap enough to open a fight with and still have MP left for a defensive ritual like dark shield ritual in welcome to elderfield if the fight turns ugly.
Tip: I treat Dark Blast as my opener, not my finisher. The +1 Fatal and Hex chance are front-loaded value — casting it on turn one means every follow-up hit benefits from the setup.
How to Unlock Dark Blast (Step by Step)
You cannot skip the prerequisite. If you walk up to Old Man Jackson before finishing Build-A-Wife, you get nothing. I tested this on a fresh save and the dialogue simply doesn't offer the ritual.
- Finish Build-A-Wife. This is the gate. No Build-A-Wife, no Dark Blast.
- Head to Old Man Jackson's. Once the quest is flagged complete, his location is your destination.
- Talk to Old Man Jackson. The conversation is what grants the ritual — there's no tome, no brazier, no purchase.
- Confirm it in your Rituals menu. Dark Blast should appear alongside your starter kit.
If you're still building out your ritual list, it's worth knowing how the whole system fits together — I break down every source in my ritual skills overview. Dark Blast is one of the free, quest-gated ones, not a Mall purchase.
Why I Slot Dark Blast Into Every Early Run
Here's my honest read after running it: Dark Blast is the best MP-to-value ritual you get before the mid-game, and it stays relevant longer than people expect.
- It's free. No gold, no vending machine, no drop RNG.
- It's early. Build-A-Wife is a natural early quest, so you get this before most fights get hard.
- It scales with your build. +1 Fatal rewards crit-stacking, and Hex rewards any build that wants enemies weakened.
- It's cheap. 5 MP keeps it spammable in longer fights.
Note: Hex is a chance, not a guarantee. Don't build a whole strategy around landing it — treat it as a bonus, not the plan.
Dark Blast vs. Your Other Early Rituals
I keep a simple mental tier list for early rituals, and Dark Blast sits near the top for offense:
| Ritual | Cost | Role |
|---|---|---|
| Dark Blast | 5 MP | Offense + crit/Hex setup |
| energy blast in welcome to elderfield | Low | Weak starter damage |
| dark shield ritual in welcome to elderfield | 3 MP | +20% Def/M.Def, +1 Recovery |
| pumpkin blast | Varies | Old Woods ritual, separate route |
My rule: open with Dark Blast for the Fatal and Hex pressure, then fall back to Dark Shield if the enemy survives the first exchange. Energy Blast is your safety net when MP is tight.
- Trying to unlock it before Build-A-Wife. It won't work. Finish the quest first.
- Skipping Old Man Jackson entirely. The ritual comes from talking, not from a pickup.
- Overvaluing Hex. It's a chance effect — don't plan your whole turn around it.
- Ignoring MP management. 5 MP adds up fast in long dungeon crawls.
Warning: If you're heading into a boss fight with low MP, Dark Blast can leave you unable to cast a defensive ritual afterward. Check your MP before committing.
Wrapping Up
Dark Blast is one of those unlocks that quietly makes the early game easier — free, early, and genuinely useful in combat. Finish Build-A-Wife, talk to Old Man Jackson, and you're set. If you're chasing the rest of the ritual list, the ritual skills overview is where I'd go next.
Dark Shield
Most players walk past the Office Slime outside the Mall F1 Hallway door because it looks like a throwaway trash mob. It isn't. That one enemy is the only gate between you and the Dark Shield ritual, a defensive cooldown that quietly carries early Elderfield fights.
This guide is the isolated route for that single pickup: where the enemy spawns, what the ritual actually does, and how I slot it into a run without wasting MP or backtracking.
| Property | Value |
|---|---|
| Ritual | Dark Shield |
| Location | Mall F1 - Hallway (door, southern snack / hallway area) |
| Prerequisite | Defeat the Office Slime in front of the Mall F1 Hallway door |
| How to obtain | Kill the Office Slime, then loot its ritual tome |
| Effect | +20% Defense and Magic Defense for 3 turns; +1 Recovery |
| MP cost | 3 MP |
| Reward | Dark Shield ritual |
What Dark Shield Actually Does (And Why 3 MP Is Cheap)
Dark Shield is a defensive ritual, not a damage skill. It grants +20% Defense and Magic Defense for 3 turns and adds +1 Recovery on top. That combination matters more than the raw percentage suggests.
- +20% Defense blunts physical hits from hallway and mall enemies.
- +20% Magic Defense covers the caster-type enemies that punish low M.Def builds.
- +1 Recovery gives you a small sustain tick while the buff is live.
- 3 MP is a low enough cost that you can re-cast it every fight without draining your pool.
If you're still mapping out which rituals are worth your MP, my ritual skills overview breaks down the full roster. Dark Shield sits in the "always keep it equipped" tier for the early mall stretch.
Tip: I treat Dark Shield as a pre-fight cast, not a panic button. Pop it on the turn before you expect a big hit so all 3 turns of value land on real damage.
Step 1: Reach the Mall F1 Hallway Door
The ritual is tied to a specific door, so you can't farm it from a random Office Slime spawn. Head to Mall F1 - Hallway and find the door in the southern snack / hallway area.
- Enter Mall F1 and move toward the hallway section.
- Locate the door in the southern snack area.
- The Office Slime is standing in front of that door — that's your target.
If you're coming from the residential side of the map, this is the same mall complex you pass through on the main route. Don't detour into side rooms; the Slime is parked right at the door.
Step 2: Defeat the Office Slime
The Office Slime is a low-threat enemy, but it's still a real fight. My rule: don't burn ritual MP on it unless you're already low on HP.
- Open with your basic attack or a cheap skill to test its damage output.
- If it hits harder than expected, cast Dark Shield after you learn the ritual — not before, since you don't have it yet.
- Save your MP for the loot turn; you want a clean kill, not a drawn-out exchange.
Note: The Slime is the prerequisite, not the reward. Killing it does nothing on its own — you still have to loot the tome it drops.
Step 3: Loot the Ritual Tome
After the Office Slime dies, it drops a ritual tome. This is the actual Dark Shield unlock.
- Walk onto the drop or open the loot prompt.
- Confirm the pickup — the tome is the ritual, not a consumable.
- Open your Rituals menu and verify Dark Shield is now listed.
Once learned, Dark Shield is permanent. You don't need to re-farm the Slime, and the ritual stays in your menu for the rest of the run.
Warning: If you leave the area without looting the tome, you'll have to come back and kill the Slime again. Grab the drop before you walk through the door.
How I Use Dark Shield in a Real Run
Dark Shield is a tempo tool. The 3-turn window is short, so the value comes from timing, not uptime.
| Situation | My Call |
|---|---|
| Boss wind-up turn | Cast Dark Shield before the big hit lands |
| Trash mobs | Skip it — save the 3 MP |
| Caster-heavy room | Cast early, Magic Defense matters most here |
| Low HP + no potions | Cast, then use the +1 Recovery turns to stabilize |
I keep Dark Shield on a hotkey and only press it when I know the next 3 turns contain real damage. Casting it into a whiffed fight is the most common way players waste the ritual.
- Skipping the Slime. It looks optional. It isn't — it's the only source of the tome.
- Killing it and walking away. Loot the drop. The ritual lives in the tome, not the kill.
- Casting Dark Shield too late. The buff starts on cast, so a reactive cast wastes a turn of value.
- Overvaluing the +1 Recovery. It's a nice bonus, not a heal. Don't build a strategy around it.
FAQ
Is Dark Shield worth 3 MP? Yes. +20% Defense and Magic Defense for 3 turns is efficient for the cost, especially in caster-heavy rooms.
Can I get Dark Shield without fighting the Office Slime? No. The Slime is the prerequisite, and the tome only drops from it.
Does Dark Shield stack with other defensive buffs? Elderfield's temporary effects generally stack at ±10% per stack, so check your active buff list before assuming it caps out. If you're tracking stacks, my welcome to elderfield blessings and curses guide covers the stacking rules.
Where exactly is the Mall F1 Hallway door? Southern snack / hallway area of Mall F1. The Office Slime stands directly in front of it.
Final Take
Dark Shield is one of the cleanest early pickups in Welcome to Elderfield: one enemy, one tome, one permanent defensive tool. The route is short, the MP cost is trivial, and the +20% Defense and Magic Defense window pays for itself the first time a boss winds up a heavy hit.
If you're building out your ritual list, pair this with the pumpkin blast pickup in the Old Woods and the [chaos thorns](.
/chaos-thorns-how-i-grab-the-sewers-ritual-fast-in-welcome-to.md) ritual in the Sewers. Between the three, you'll have offense, defense, and utility covered before the mid-game difficulty spike.
Grab the tome, hotkey the ritual, and stop letting the Office Slime walk away with your Defense buff.
Energizing Blast
Energizing Blast is one of the quieter pickups in Welcome to Elderfield. It doesn't hit hard, it doesn't look flashy, and if you're speedrunning the early game you'll probably walk right past it. But it's a Library ritual, which means it sits in the same pool as some of the most useful utility skills in the game — and that alone makes it worth a detour.
This guide is narrow on purpose. I'm not going to rehash the main route or explain how rituals work in general. I'm only covering where Energizing Blast lives, what it actually does, and whether you should bother slotting it. If you want the full ritual system breakdown, that lives in the ritual skills overview.
- Location: Library
- Prerequisite: Found in the Library (no quest gate, no boss gate)
- Effect: 15% chance to generate 1 AP
- Reward: Energizing Blast ritual
- Steps: Find Energizing Blast in the Library
That's the whole entry. There's no puzzle, no code, no hidden trigger. You walk into the Library, you find it, you learn it.
What Energizing Blast Actually Does
Let me be blunt about the math, because this is the part most guides skip.
Energizing Blast has a 15% chance to generate 1 AP. That's it. No damage, no buff, no debuff. It's a pure AP economy ritual.
On paper, 15% sounds weak. In practice, it depends entirely on how many turns you're taking per fight. Here's how I break it down:
| Turns per fight | Expected AP generated | Verdict |
|---|---|---|
| 1–2 turns | ~0.15–0.3 AP | Not worth a slot |
| 3–5 turns | ~0.45–0.75 AP | Marginal |
| 6+ turns (bosses, elites) | ~0.9+ AP | Genuinely useful |
Tip: My rule is simple — if a fight is going to last fewer than four turns, Energizing Blast is dead weight. If it's a long attrition fight, it's a free AP trickle that costs you nothing but a slot.
Where to Find Energizing Blast in the Library
The Library is a contained area, so this isn't a needle-in-a-haystack situation. Here's the route I use:
- Enter the Library and clear the immediate room so you're not reading text while something is chewing on you.
- Sweep the shelves and side rooms — Energizing Blast is a pickup, not a purchase, so it won't be behind a counter.
- Interact with the ritual when you find it. It goes straight into your Rituals menu.
- Confirm it's listed before you leave. If it's not in the menu, you didn't actually grab it.
Note: The Library sits inside Elderfield proper, so you can grab Energizing Blast on the same pass you use for other Elderfield errands. I usually pair it with the welcome to elderfield cooking and recipes unlock since both are low-risk pickups.
Is Energizing Blast Worth Slotting?
This is where I'll give you a straight answer instead of hedging.
Yes, but conditionally. Here's my honest breakdown:
- Early game: Slot it. You have empty ritual slots and nothing better to put there. Free AP is free AP.
- Mid game: Bench it the moment you pick up a real damage or defense ritual. The 15% proc rate doesn't scale with your stats.
- Boss fights: Bring it back. Long fights are exactly where a 15% AP trickle earns its keep.
The mistake I see players make is treating Energizing Blast like a core skill. It isn't. It's a filler ritual with a niche use case, and that's fine — not every pickup needs to be a build-defining choice.
Warning: Don't confuse Energizing Blast with energy blast in welcome to elderfield. They sound similar, they're both rituals, and they do completely different things. Energy Blast is a weak shot of energy. Energizing Blast generates AP. Mixing them up in your loadout is a real way to waste a slot.
How Energizing Blast Fits the Ritual Economy
Rituals in Welcome to Elderfield come from three sources: you start with some, you buy some, and you find some. Energizing Blast is in the "find" category, which makes it one of the easier acquisitions in the game.
For context, here's how it compares to other early ritual pickups:
| Ritual | Source | Effect | Difficulty |
|---|---|---|---|
| Energizing Blast | Library | 15% chance for 1 AP | Easy |
| pumpkin blast | Old Woods | Combat ritual | Medium |
| chaos thorns | Sewers | Combat ritual | Medium | | dark shield ritual in welcome to elderfield | Mall F1 | +20% Def/MDef, 3 turns | Medium |
| warp in welcome to elderfield | Mall F1 | Home teleport | Easy |
If you're building a ritual collection, Energizing Blast is a cheap checkbox. If you're building a combat loadout, it's a situational pick at best.
Common Questions About Energizing Blast
Does Energizing Blast stack with itself? No. It's a single ritual with a single proc chance. Slotting it twice does nothing.
Can I buy Energizing Blast instead of finding it? No. It's a Library pickup. The mall vending machine tomes sell different rituals entirely.
Does the 15% chance scale with anything? Not that I've found. It's a flat rate. Don't expect it to improve as you level.
Should I grab it if I'm skipping the Library? If you're skipping the Library entirely, you're missing more than just this ritual. I'd grab it on principle.
Final Take
Energizing Blast is a small, honest pickup. It does one thing, it does it at a fixed rate, and it doesn't pretend to be more than it is. I grab it every run because it's cheap, it's in the Library, and there's no reason not to. Whether you keep it slotted past the early game is a judgment call you'll make the first time you watch it proc three times in a boss fight and realize it just paid for itself.
If you're working through the Library and want to keep your ritual collection tidy, the ritual skills overview is where I'd go next. Everything else is just walking into rooms and pressing the interact button.
Chaos Thorns
The Chaos Thorns ritual is one of those Sewers pickups that looks trivial on paper and then eats twenty minutes of your run because you didn't know the chamber doors gate it. I've watched too many players sprint past the sealed chambers, assume the ritual is a random drop, and then complain in Discord that it's bugged.
It isn't bugged. It's gated. This guide is the short version: what the Chaos Thorns ritual actually is, exactly which Sewers chamber doors you need to open first, and the cleanest order to grab it so you're not backtracking through flooded tunnels for no reason.
- Location: Sewers (chamber interior, behind the opened doors).
- Reward: Chaos Thorns ritual.
- Rigid steps:
- Reach the Sewers.
- Open the chamber doors.
- Obtain Chaos Thorns.
- Skip if: You haven't opened the chamber doors yet — the ritual will not be reachable.
What the Chaos Thorns Ritual Actually Is
Chaos Thorns is a ritual, not a weapon or a stat trinket. That distinction matters because players keep searching for it in the wrong category. You don't equip it from an inventory slot the way you would an emerald ring from Smoffes; you acquire it as a ritual entry tied to your progression.
If you're still mapping out how rituals slot into your build, the ritual skills overview is the reference I keep open on a second monitor while routing. Chaos Thorns is one node in that larger system, and knowing where it sits saves you from over-investing in the wrong ritual line early.
Note: Rituals are progression-gated, not RNG-gated. If Chaos Thorns isn't appearing, the chamber doors are almost always the reason.
Open the Chamber Doors First (This Is the Whole Gate)
The Sewers chamber doors are the single hard requirement. Everything else is just walking. If you try to grab Chaos Thorns before the doors are open, you'll find an empty chamber and assume the game glitched.
Here's the order I run it in:
- Enter the Sewers and clear the immediate tunnel path — don't linger on side pockets yet.
- Locate the chamber doors. They're the sealed set inside the Sewers, not a random wooden door.
- Open them. This is the trigger. Once they're open, the chamber interior becomes accessible.
- Walk in and obtain Chaos Thorns. No fight required for the pickup itself.
That's it. Four steps. The reason people struggle is they treat step 3 as optional and try to brute-force the chamber from the wrong angle.
Tip: My rule when I test this route — open the chamber doors before you loot anything else in the Sewers. Backtracking through flooded corridors for a single ritual is the most common time sink I see in this area.
Sewers Route at a Glance
| Step | Action | Gate? |
|---|---|---|
| 1 | Reach the Sewers | No |
| 2 | Find the chamber doors | No |
| 3 | Open the chamber doors | Yes — hard gate |
| 4 | Obtain Chaos Thorns | No |
| 5 | Exit and resume route | No |
If you're the type who likes a checklist, that table is the entire guide. The rest of this page is just the reasoning and the mistakes to avoid.
- Assuming Chaos Thorns is a drop. It isn't. It's a chamber reward behind the doors.
- Opening the doors and leaving. The doors being open doesn't auto-grant the ritual — you still have to walk in and grab it.
- Looting the Sewers out of order. Grab the ritual first, then sweep for anything else you came for.
- Confusing it with other ritual pickups. Different chapters, different gates. Pumpkin Blast, for example, follows the same pattern but lives in the Old Woods — see the [pumpkin blast](.
/pumpkin-blast-guide-how-i-grab-the-old-woods-ritual-fast.md) route if you're cleaning up rituals across chapters.
Warning: If you're mid-run and the chamber looks empty, don't reload your save. Check the doors first. Nine times out of ten that's the fix.
Where Chaos Thorns Fits in Your Progression
I treat Chaos Thorns as a mid-route ritual pickup, not a build-defining one. It's worth grabbing on your first Sewers pass because the detour is short if you open the doors on the way in. It becomes a waste of time only when you've already cleared the Sewers and have to walk back.
If you're stacking rituals and consumables efficiently, pair this pickup with your other Sewers-adjacent chores. Cooking buffs from welcome to elderfield cooking and recipes and foraging runs from welcome to elderfield foraging and resource collection are the kind of prep that makes ritual-heavy stretches smoother, since you're not stopping mid-dungeon to fix your inventory.
For players who like stacking blessings before a ritual-heavy push, the [small god shrine prayer](.
/small-god-shrine-prayer-how-i-farm-random-blessings-fast-at-.
md) loop at Hans Farm is a low-cost way to top up before you commit to a Sewers run. And if you're still gearing up for the harder Sewers encounters, the treasure goblin fight is a good benchmark for whether your damage is where it needs to be.
FAQ
Do I need to fight anything to get Chaos Thorns? No. The pickup itself is behind the chamber doors, not behind a boss.
Can I get Chaos Thorns without opening the chamber doors? No. The doors are a hard gate. No doors, no ritual.
Is Chaos Thorns missable? Not permanently, but it's easy to skip if you don't open the doors on your first pass. You can always come back.
Does Chaos Thorns matter for my build? It's a ritual entry, so it matters if you're investing in that ritual line. Check the ritual skills overview before you commit resources.
Final Thoughts
Chaos Thorns is a two-step collectible dressed up as a mystery. Open the chamber doors in the Sewers, walk in, grab the ritual. The only reason it feels hard is that the gate isn't obvious until you've already missed it once.
I keep this route short on purpose — the Sewers are not where you want to be sightseeing. Open the doors on your way in, take the ritual, and get back to the parts of Elderfield that actually reward the detour.
Warp
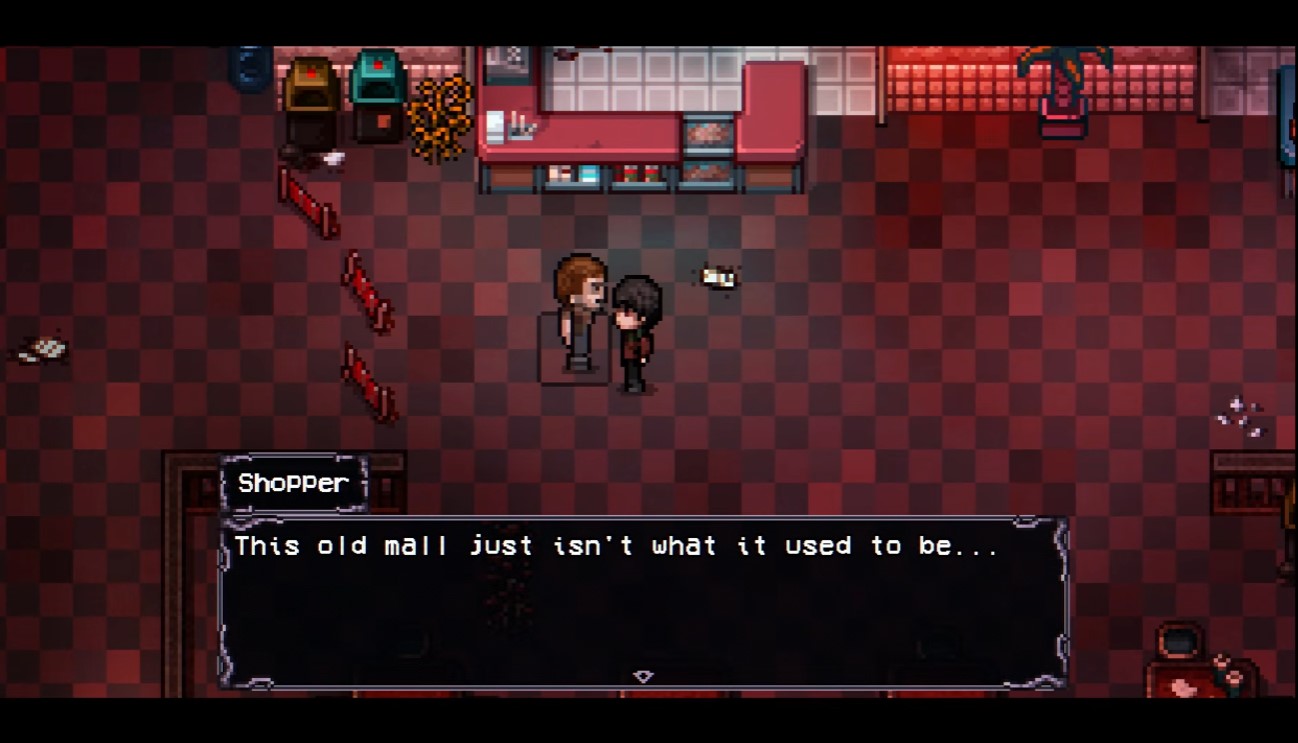
NPC Shopper
Warp is the single most underrated ritual in Welcome to Elderfield. It costs nothing, it's handed to you by a random Shopper in the first shop you walk into, and it deletes every long walk back to your house for the rest of the run.
I grab it before I do anything else in Mall F1. Below is the exact two-step pickup, what the ritual actually does, and why I treat it as a mandatory early grab rather than an optional collectible.
- NPC: Shopper on the far right, standing by the SALE / camera display
- Prerequisite: Enter Ultra Video
- Cost: Free
- Reward: Warp ritual (teleports you home)
- Steps: Enter Ultra Video → talk to the Shopper on the far right by the SALE / camera display
Why Warp Is Worth Grabbing Immediately
Most rituals in Elderfield are combat tools. Warp is pure logistics, and that's exactly why it's valuable early. Every minute you don't spend walking back to your house is a minute you spend farming, cooking, or pushing into the next area.
I tested this on a fresh save. Without Warp, a round trip from the far side of the map back to my house eats a huge chunk of a day cycle. With Warp, it's one menu action. That delta compounds across an entire run.
Tip: My rule is simple — if a ritual is free and it saves travel time, I take it before I take anything else. Warp is the poster child for that rule.
Step 1: Enter Ultra Video in Mall F1
Ultra Video is the first shop you hit after walking into Mall F1. You don't need to unlock it, buy anything, or complete a quest first. Just walk in.
If you've been skipping the mall because it looked like a dead-end retail area, that's the mistake. The mall is where several early freebies live, and Ultra Video is the first stop.
Step 2: Talk to the Shopper on the Far Right
Inside Ultra Video, head to the far right side of the shop. You're looking for a Shopper standing next to the SALE / camera display.
Talk to them. That's it. The Warp ritual is added to your Rituals menu, free of charge.
- Don't talk to the wrong NPC — the Shopper is specifically the one on the far right by the SALE / camera display
- Don't buy anything first; the ritual is free
- Don't leave the shop before confirming the ritual landed in your menu
Note: If you're not sure where your rituals live, check the ritual skills overview — it explains the Rituals menu, which rituals are combat-only, and which work outside battle. Warp is the latter.
What Warp Actually Does
Warp teleports you home. That's the whole effect, and that's the whole point.
| Property | Detail |
|---|---|
| Effect | Teleports you home |
| Cost to obtain | Free |
| Source | Shopper, Ultra Video, Mall F1 |
| Category | Utility ritual (works outside battle) |
| Prerequisite | Enter Ultra Video |
Because it's a utility ritual, you don't need to be in combat to use it. That's what separates it from the Energy Blast-style offensive rituals you start with.
How I Use Warp in My Route
I don't treat Warp as a panic button. I treat it as a scheduled shortcut. Here's the pattern I run:
- Push out from my house into the current objective area
- Farm, loot, or complete the local task until my inventory or my day cycle is nearly spent
- Warp home instead of walking
- Cook, sleep, restock, and push out again
Same loop on Hans Farm early: chop every tree and rock for XP and mats, Warp home when low, bath, repeat. Farm mobs are easy — see hub tip.
That loop removes the single biggest time tax in the early game. If you're also working on cooking, the welcome to elderfield cooking and recipes guide pairs naturally with this — Warp gets you home, cooking turns the trip into value.
Tip: When I'm farming resources out in the wild, I pair Warp with the welcome to elderfield foraging and resource collection loop. Fill your bags, Warp home, dump everything, repeat. No wasted walking.
- Skipping the mall entirely. Players assume the mall is cosmetic. It isn't — free rituals live there.
- Talking to the wrong Shopper. There's more than one NPC in the area. The one you want is on the far right, by the SALE / camera display.
- Assuming it costs something. It doesn't. Don't grind currency for a free ritual.
- Forgetting it exists in the menu. Warp is a utility ritual, not a combat skill. If you're only checking your combat hotbar, you'll miss it.
When Warp Saves Your Run
There are a few situations where Warp stops being a convenience and starts being a survival tool:
- You're deep in a dangerous area with low HP and no healing left
- A world event like the blood moon event in welcome to elderfield resets mysteries and respawns monsters — being able to bail home instantly matters
- You've stacked curses and need to reset your state before the next push — see welcome to elderfield common curses for how bad those can get
- You're carrying a full load of foraged materials and don't want to risk losing them
Warning: Warp gets you home, not out of a fight. If you're mid-combat with something like the dripper encounter in the sewers, don't assume Warp is your escape hatch. Handle the threat first.
Warp vs. Other Early Rituals
To be clear about where Warp sits in the priority order: it's not a damage ritual, and it won't carry a fight. It's infrastructure. You grab it because it makes every other activity in the game faster.
If you're building out your ritual list, Warp is the free one you take first, then you layer combat rituals on top. The ritual skills overview breaks down the full set if you want to plan the order.
Final Thoughts
Warp is the cleanest early grab in Welcome to Elderfield: two steps, zero cost, permanent payoff. Enter Ultra Video in Mall F1, talk to the Shopper on the far right by the SALE / camera display, and you're done.
I don't skip it on any run. The time it saves compounds every single day cycle, and there's no downside to picking it up the moment you walk into the mall. Grab it early, then get back to actually playing the game.
More Welcome to Elderfield guides
Go back to hub for full walkthrough, or browse all games.